How to Create a Module Page
Overview
Each VASSAL module has its own page in the Modules namespace here on the VASSAL Wiki. There are four steps to creating a module page:
- Start a new page for the module.
- Copy the module page template to your new module page.
- Fill in the details for your module.
- Upload your module.
This tutorial will walk you through each step.
Please note that many of the steps described here require you to be logged in to the site to do them. If you are following the tutorial but are not logged in, log in now.
Start a new page
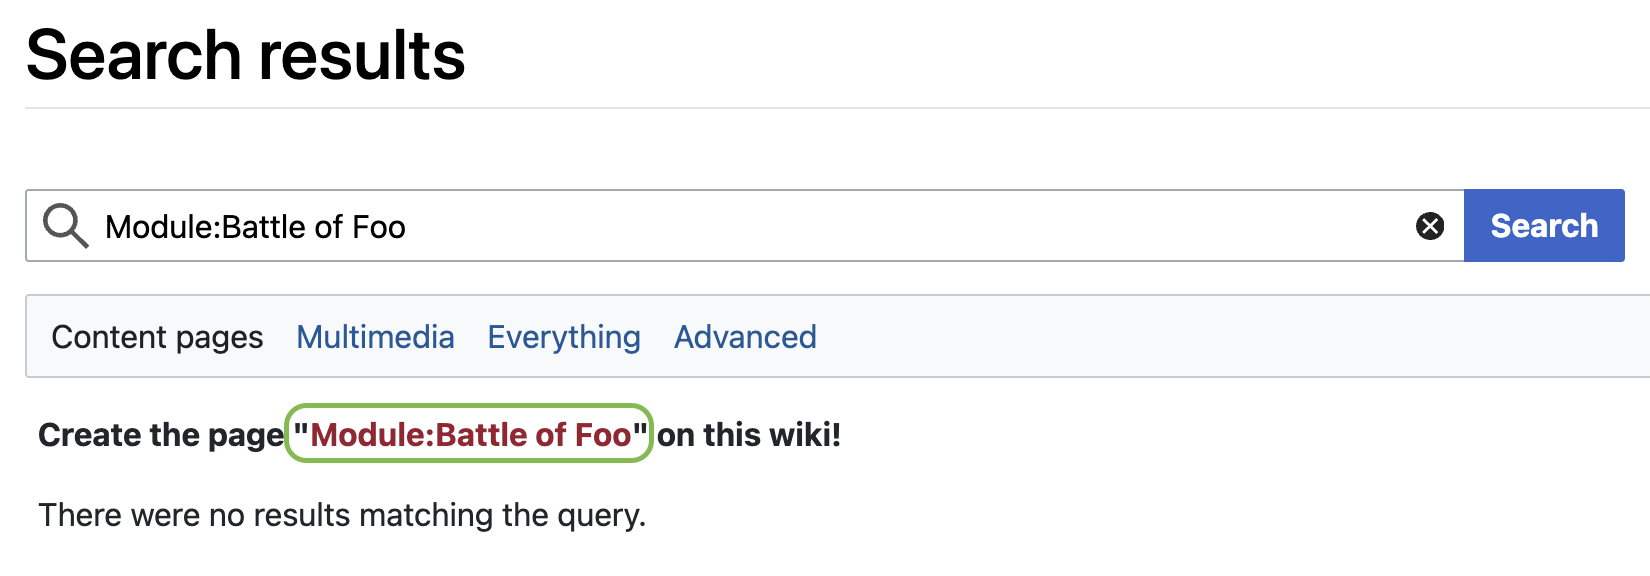
There are several ways to start a new page; the most straightforward one is to type "Module:", followed by the name of the game for which you are creating a module, in the wiki's search box at the top of the page. (Note: The "Module:" preceding the name of the game is a namespace. Namespaces help separate types of content in our wiki.) If you are browsing in a narrow window, you may need to click he hamburger menu to reveal the search box.
This will take you to a "Search results" page. If there really is no page for your module, you'll see the link "create this page", circled in green in the screenshot below.
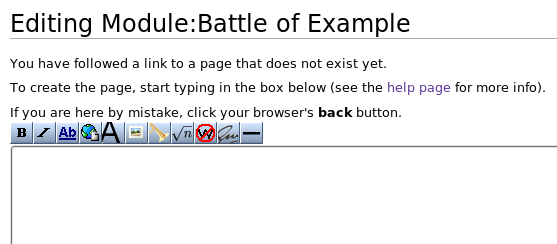
After clicking the link, you will be taken to a page where you can begin editing.
Proceed to the next section, where we will begin to fill in the module page.
Copy the module page template
All VASSAL module pages follow a set style in order to make it easy for users to locate the information they need and to give our module pages a uniform appearance. Creating a module page from scratch is a fair amount of typing, so we provide a template for you to copy:
{{GameInfo|image=|publisher=|year=|era=|topic=|series=|scale=|players=|length=}}

== Files and Module Information==
{{ModuleFilesTable2}}
{{ModuleVersion2|version=}}
{{ModuleFile2|filename=|description=|date=|size=|compatibility=|maintainer=|contributors=}}
|}

== Change Log ==

== Comments ==

== Screen Shots ==
<gallery heights=200px widths=300px perrow=3>
</gallery>

== Players ==
<div style="column-count: 4; -moz-column-count: 4; -webkit-column-count: 4">
* {{email|someguy@example.com|Some Guy}}
</div>

__NOTOC__
Select the template text and paste it into the text area on the editing page. Then, click the "Show Preview" button below the editing area.
You should now see a skeletal version of your module page previewed above the editing area. Proceed to the next section, where we will describe what each element in the template does and how to fill in the details for your module.
Fill in Your Module Details
In this section, we will walk you through adding the information for your module to the module page template. We will make frequent use of wiki markup. For more details on wiki markup see Help:Formatting.
Module pages are divided into sections marked by level-2 headings: == Heading ==. (Level-2 headings correspond to the <h2> element in HTML.)
If you look at the module page template, you'll see headings for "Files and Module Information", "Change Log", "Screen Shots", and "Players":
{{GameInfo|image=|publisher=|year=|era=|topic=|series=|scale=|players=|length=}}
== Files and Module Information ==
{{ModuleFilesTable2}}
{{ModuleVersion2|version=}}
{{ModuleFile2|filename=|description=|date=|size=|compatibility=|maintainer=|contributors=}}
|}
== Change Log ==
== Comments ==
== Screen Shots ==
<gallery heights=200px widths=300px perrow=3>

</gallery>
== Players ==
<div style="column-count: 4; -moz-column-count: 4; -webkit-column-count: 4">
* {{email|someguy@example.com|Some Guy}}
</div>

__NOTOC__
These headings divide the module page into sections. Above the "Files" section is the markup which produces an information box for your module.
The Module Information Box
Here we will look at the module information box one piece at a time. The module information box is produced by a MediaWiki template. Templates define text which will be included into a page when it is rendered. The syntax for templates is {{Name|arg1=val1|...|argn=valn}}, where Name is the name of the template, arg1 to argn are named arguments, and val1 to valn are the values of those arguments. Argument-value pairs are separated from the template name and from each other by the pipe character ("|").
The template which produces the module information box is called GameInfo, and takes the following arguments:
image- the name of the image to display,
publisher- the publisher of the game Current Publisher list
year- the year the game was first published (regardless of publisher)
era- the historical era the game covers, if applicable. Defined Era examples
topic- the topic the game covers, if applicable. Defined Topic examples
series- the series the game is part of, if applicable
scale- the scale of the game, if applicable. Defined Scale examples
players- the number of players the game accomodates, format as "n to n". Defined Players examples
length- the minimum length the game, in minutes, it takes to play the board game
Now, an example: The module for The Longest Day uses this code
{{GameInfo|image=TLD.jpg|publisher=Avalon Hill|year=1980|era=WWII|topic=Normandy
Invasion|scale=operational|players=2+|length=long}}
which produces this info box:

| Publisher | Avalon Hill | Era | WWII |
|---|---|---|---|
| Year | 1980 | Topic | Western Front |
| Players | 2 to 4 | Scale | Operational |
| Length | 240 min |
Notice that the series isn't specified here; series is an optional argument, since not every game is part of a series. The GameInfo template automatically adds your module page to the Modules category, as well as the categories for the game's publisher, era, and topic.
Please note: Each field in the info template above only supports one entry! For example the game may have multiple Publishers, but you can only list one. In these cases choose the most relevant entry to the field
The Files and Module Information Section
This section of the module page contains the table listing files available for download. The code for this section consists of four parts, seen here:
{{ModuleFilesTable2}}
{{ModuleVersion2|version=}}
{{ModuleFile2|filename=|description=|date=|size=|compatibility=|maintainer=|contributors=}}
|}
The parts:
- The
ModuleFilesTable2template creates the table header. - The
ModuleVersion2template creates a table row which specifies the module version for the files appearing in subsequent rows. - The
ModuleFile2template creates a row containing information about a file and a link for downloading it as well as who created or contributed to the development of the module. - The final
|}ends the table.
An example: The following code
{{ModuleFilesTable2}}
{{ModuleVersion2|version=1.1}}
{{ModuleFile2|filename=battle_of_example-1.1.vmod|description=module|date=2010-08-03|compatibility=3.1|maintainer={{email|tom@example.com|Tom Johnson}}|contributors={{email|richard@example.com|Dick Smith}}, {{email|harold@somewhere.edu|Harry Jones}}}}
{{ModuleVersion2|version=1.0}}
{{ModuleFile2|filename=battle_of_example-1.0.vmod|description=module|date=2009-10-10|compatibility=3.0|maintainer={{email|tom@example.com|Tom Johnson}}|contributors={{email|richard@example.com|Dick Smith}}, {{email|harold@somewhere.edu|Harry Jones}}}}
{{ModuleFile2|filename=battle_of_example-maps-1.0.vmdx|description=extra maps|date=2009-10-10|compatibility=3.0|maintainer={{email|tom@example.com|Tom Johnson}}|contributors={{email|richard@example.com|Dick Smith}}, {{email|harold@somewhere.edu|Harry Jones}}}}
|}
produces this table of files:
| Filename | Filetype | Size | Date | Compatibility | Developer | Other Contributors |
|---|---|---|---|---|---|---|
| 1.1 | ||||||
| battle_of_example-1.1.vmod | module | "battle_of_example-1.1.vmod" does not exist | 2010-08-03 | 3.1 | Tom Johnson | Dick Smith, Harry Jones |
| 1.0 | ||||||
| battle_of_example-1.0.vmod | module | "battle_of_example-1.0.vmod" does not exist | 2009-10-10 | 3.0 | Tom Johnson | Dick Smith, Harry Jones |
| battle_of_example-maps-1.0.vmdx | extra maps | "battle_of_example-maps-1.0.vmdx" does not exist | 2009-10-10 | 3.0 | Tom Johnson | Dick Smith, Harry Jones |
The parameters for ModuleFile2 are described here:
- filename
- the name of the file
- filetype
- the type of file or very short description i.e module, extension, help files, rules summary etc..
- date
- the release date of the file, format is YYYY-MM-DD
- size
- the size of the file (this is calculated for you)
- compatibility
- the versions of VASSAL this file is compatible with
- maintainer
- the developer of the module / responsible for the module's maintenance
- contributors
- other people that contributed or helped make the module possible
If a file is not already uploaded, then you'll see a red link in the row in the file table corresponding to that file. You can use this link to upload your file, as we will see in the final section of this tutorial.
Email addresses are listed using the email template. The first argument of this template is the email address, while the second (optional) argument is the text to display for the link. The email template ensures that email addresses are shown only to users who are logged in to the wiki.
Below the ModuleFile2 is an appropriate place to display other important information about the module.
The Change Log
The Change Log can be used to list changes/improvements/fixes that are added over time from version to version. Changes should be grouped by version, and the changes for the most recent version(s) should appear at the top.
* Version 10.4 - Requires VASSAL Version 3.5.8 or later!
** Warning displayed when desert spaces or desert-adjacent spaces activated for combat in summer turns.
** Warning displayed when MEF is played as the event when Salonika already marked as having been played.
** Right-click menu now allows trenches to be placed properly while besieging an enemy fort.
** CP Removed pile now sorts correctly the way the other piles do (when "Draw Specific Cards" selected).
** Automatic placement of control markers, besieged markers, and trench capture can be disabled in preferences
* Version 10.3 - Requires VASSAL Version 3.5.5 or later!
** 10.3.1 - Cracow was missing from the internal list of forts, so didn't behave like a fort space.
** SPANISH language translations now available, courtesy of javiermunozk!
.
.
.
The Comments Section
This section contains longer descriptive information about the various files, module versions, how to play or use the module etc. If the information provided here is very extensive it should be moved to the Module's talk page instead and provide a simple link to the talk page here. Users with comments or questions for the game can also use the Module Talk page that Module Contributors, Maintainers, Designers or Vassal Developers can check for info or answer etc..
FIXME: How to access module talk page and link
The Screen Shots Section
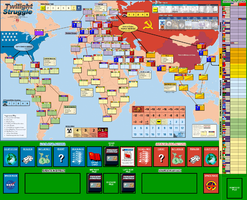
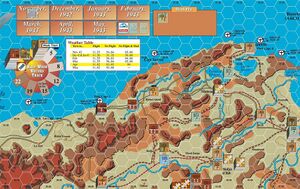
This section contains a gallery of screen shots of the module in action. To add an image to the screen shot gallery, add the name of the image on a new line between the gallery tags, one image name per line:
<gallery heights=200px widths=300px perrow=3>
  Image:Twilight_Struggle_Map.png
  Image:TunisiaScreenshot.jpg
</gallery>
The above code produces this screen shot gallery:
For full details on how image galleries work in this wiki, see the gallery documentation.
For full details on how to upload images see Upload a file.
The Players Section
This section contains a listing of people interested in playing this game. Email addresses are specified as in the the Module Information section. The following code
<div style="column-count: 4; -moz-column-count: 4; -webkit-column-count: 4">
* {{email|someguy@example.com|Some Guy}}
* {{email|s.o.guy@example.com|Some Other Guy}}
* {{email|y.a.guy@example.com|Yet Another Guy}}
</div>
produces this:
- Some Guy
- Some Other Guy
- Yet Another Guy
Each email address is an item in a bullet list.
Upload Your Module
If you've added an entry for your module in the Files section of your module page, then you should see a red link in that row. To upload the file corresponding to that link, simply click the link. Doing so will take you to an upload page where you can upload your file. To see an example of such an upload page, follow this link: DoesNotExist.vmod. Note: Please do not upload a file with this name—that will ruin the example.
If you are uploading a new version of a module, please do not overwrite an existing version. Give your new version its own version number and put that version number in the filename. This will help users tell which version of your module they're using.
Do not upload modules/files in zip format - they will be rejected. Use the correct extension: .vmod for modules, .vmdx for extensions, .vsav for saved setups and .vdck for saved decks

